Climbing beans, tomatoes, basil and our beloved zucchini! Must be coming into summer. I will be back in this space soon.


Climbing beans, tomatoes, basil and our beloved zucchini! Must be coming into summer. I will be back in this space soon.
Little farm in the city is no longer in the city. Yes it’s official we have moved.
After months of enquiring with banks, brokers and ourselves. We decided financially it was better for us, right now at this moment to rent.
I cannot tell you how much our lives have changed for the better, since moving to a bigger home. The boys barely fight, we can eat dinner at our table again and not have to battle my crafting stuff. And there’s a general feeling of contentment.
We are so blessed with the best part of an acre of land.
I cannot tell you the joy we felt when we inspected this property and found a chicken pen and fruit trees and vegetable garden already here.
Rather than me gush on about this sweet little house lets get to the good bits… The gardens


There’s still more to share, but at the same time so much work to be done. Weeding, planning and the last of the unpacking. So for today I will leave it here.
Happy Gardening
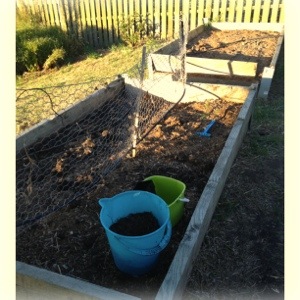
So here it is, my tell all images of the gardens post winter. Oh the shame…

Weedy and sadly neglected.
However I’m slowly working my way through the gardens. Pulling old and spent plants. Feeding the chooks handfuls of chick weed and enjoying (most of all) the rows upon rows of carrots.
This winter, carrots have been the one vegetable I haven’t brought.

This weekends plan involves a lot of manure, compost and digging. Quite frankly I’m looking forward to this, this time to connect with the earth. Do you have any garden plans for this weekend?

After a seemingly fast and surprisingly warm winter, spring has sprung here rather early.
The mulberry tree is flowering, along with the apple trees.
The soil is beginning to warm and I’m ready to begin planting . Each afternoon, while the boys play I dig over a patch of garden. It’s so dry at the moment – nearly a month without notable rain. It’s rather like digging boulders, the clay is set so hard.
Rain has been predicted this week, however those promising looking clouds roll away each evening leaving a dusty haze and a fabulous sunset.
So I’ve resorted to using a hose to soak the soil, hoping I can get the digging fork in even a few inches.
In the chook house, I’ve been gathering a single egg, every other day, for most of winter. I’ve become rather clever at cooking with one egg. But today – oh my there was two eggs. Two!

The possibilities of what I can do with those two eggs…
How has your garden and chooks faired this winter? Any good advice on keeping up the egg production or do you think it’s better to let them rest?
Oh yes the annual hibernation has hit here. For the last month I’ve spent way too much time watching movies with the boys, caring for what seemed an endless round of colds, way too much time watching the boys play outside in the weak winter sun, dodging the rain, going on a (grown up only) womens retreat and enjoying the school holidays.
I have no less than 5 posts in the drafts folder waiting for photos or photos to be sent to the computer, finished, edited or just plain uninspiring to me…. *sigh* There is never enough hours in the day for everything. BUT…. Over the last few weeks I have created several new pages, have a quick peek just under the header. Yep there’s a few new ones up there! I’m hoping to have everything updated by the end of the month; I find big time frames are very helpful right now.
So instead of some fabulous and witty post about the garden I will leave you with a photo of a chook.
Happy Gardening!

really is there any other way to eat them?
This plant is growing from seeds that I saved from last year. I think I many have been a little heavy-handed when sowing them, expecting the sparrows would eat many of the shoots.

Alas they ate NONE! The old iron trellis is simply covered in pea tendrils. However, the thrilling part for anyone under the age of 9 around here, is the flowers. A sure sign that pods will soon be ready to eat. I’m yet to tell the older two that there are peas to pick, as Mr2 has decided he likes peas. And dang it, thats the second vegetable he will eat without an arguement! For now its’ our little secret!

Just a quick one tonight, we’re still in party mode here. Two down and one to go. All I’m asking is please, please universe let the rain hold off; I cannot contain 10 boys in this tiny house. Oh no!
……………….
Do you have an online business that needs some help or you have an idea, but need help to make it… work? Leonie, from Goddess Guide book is offering for FREE her “How To Be A Biz + Blog Star e-book”
Full of brilliant advice and tips to get your business flowing. So click away cause this baby is free!

The raised beds here at Little Farm are completely enclosed. see here for more details Because of this Worms cannot enter the gardens. In the first years, worms numbers were low. A few came within the soil from here, but numbers weren’t enough to sustain a healthy soil. But I’ve since managed to increase the number of worms in the gardens!

Soil is worm food, a good soil means good worm food. To create this ‘good food’ I began by only using organic products. Blood and bone, organic dynamic lifter, compost and my ‘homemade’ chicken poo. It’s dug in, to get as much ‘organic matter’ into the soil. Soil Microbes are found within all soils and they will begin the breaking down process, but add worms to the mix and it will happen faster.
With the soil fed, it’s time to look to the worms. How exactly did I get worms? Anytime we dug in the ground, it rained or lifted rocks and garden edging, we found worms. These worms went straight into the gardens. Instant worm number boost.

This happened over a period of a few years. And now there are worms in abundance. Another way to encourage worm wildlife is to use compost worms. Normally these worms are kept within a wormfarm system. I’ve had varied rates of success with worm farms, most end with the death of worms as I’ve forgotten to feed them! One method I’ve wanted to try is worm farming within the garden beds. Inserting a tube, with holes drilled into it, in the ground, add worms along with a few good handfuls of worm ‘food’. A bucket with a lid and the bottom cut off works a treat. The idea behind this method is the worms will leave the tube dispersing their casting within the soil and will return to the tube to feed. Has anyone had any experience with this method?
Happy Worm Farming!
{this moment} – A Friday ritual. A single photo – no words – capturing a moment from the week. A simple, special, extraordinary moment. A moment I want to pause, savor and remember.

After our massive haul of pumpkins last year, I was buzzing with excitement to discover self-seeded seedlings popping up early last summer.

As last years pumpkins, these seedlings were growing in a blue pot = portable. Great as I really didn’t want them taking over the yard again. So off the pot went across the yard (via a bag trolley) hopefully to grow us many pumpkins…. under the clothes line.

Under the clothes line really is dead space. For years now I’ve meant to dig out the garden, erm yes there was a garden there oh about 5 years ago. And in this garden I would plant a great drift of lavender, the washing would gently brush over the bushes and smell delicious. Yeah, It’s on my list.
Instead of lovely lavender, my washing has been drying daily over the pumpkin vine. Over the grass, up the fence and the neighbours shed the vine grew, Oh I had high hopes of a bumper crop similar to last years.

Fast-forward to May 2012 the nightly chill has set in and the soil is rapidly cooling. The vine is slowly dying back to show her bounty of 3 pumpkins. What only 3/ Let’s have a closer look…. Yep just 3 of the buggers. I cannot express how disappointed I am. 10 maybe 15, not to be greedy. But 3?

These babies shall be rationed out s.l.o.w.l.y I tell you.
