A Little Farm Planting Guide for Summer Vegetables

I am so excited about this years approaching summer months.  For the first time since building our Raised Vegetable Gardens I have a planting guide that I think might actually work for a continual harvest!  Like many gardeners we have a big glut at the height of summer and then a little until the winter harvest.  Frustrating I must say.  Add to this my time being limited with the family I decided I needed to have a plan on paper.

To make the gardens work for me this year, I began by listing all the vegetables we like to eat over summer, an estimate of how much I think we will eat each week and a list of seeds I will need. ~ My two favourite reference books are Annette MacFarlanes ‘Organic Vegetable Garden’  and Yates ‘Garden Guide’ .  Finally to the list, I added how long it would take each plant to begin producing. 

This is what I ended up with

Next up I mapped what will go where in each garden.  I have 5 raised beds here at Little Farm.  Each bed is 1m wide by 3m long and follows a yearly rotation.  Along with the beds I have many 100L pots.  Last year one of these pots is what grew the great pumpkin vine!

So there it is, my great plan for summer 2011.  How have you planned your summer garden?

Sowing Seeds

Sowing seeds

farming-in-the-city-logo 1

With the cooling change of autumn comes the renewed sense to sow seeds.  Brassicas, root crops and legumes are rolling out to the gardens.

But getting from seed to little plant can be a challenge. 

Before starting remember ‘Hygiene’ is very important.  It is during the germination stage that many seeds fail, often with damping off.

The first step is to pick a good quality seed raising mix.  I prefer to buy mine, however you can make your own.  But it must be ‘sterilized.’  This can be done in a oven or the microwave.  The heat is required to kill any ‘bacteria’ that maybe in within the media.  However this will kill any good and bad bacteria. 

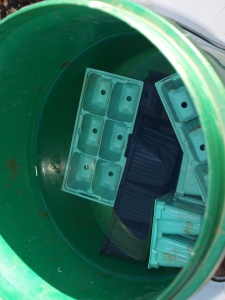
Soaking seed trays in bleachThe next step is to soak your trays/ punnets and any tools you my need too.  This too will kill any ‘badies’ that maybe on the containers.  I use a weak bleach solution (10-20ml to 5+L  water)  and immerse the trays overnight.  I have read of Dettol being used, however I use bleach as it is used in commercial situations.

Before you jump in and fill your trays, prepare an area to work on.  If you can wipe it too down with a weak solution of bleach. 

When filling your trays, do not pack them down hard.  So may do this and there is no room for the roots to expand or air for them to breathe.  Before you stick your seeds in give the full trays a good soaking with water and allow to drain, preferably mix a fish emulsion into the water for an extra boost. 

Now sow the seeds.  Seeds generally need to be planted to a depth twice their size.  Small seeds such as lettuce can be sprinkled on the surface of the mix and covered with vermiculite.   It is not neccessary to use vermiculite, a fine sprinkling of soil can also do the job.  (Remember some seeds are best planted directly into the soil such as corn, carrots, beetroots and beans.)   Don’t forget to label the trays and use a water proof pen… it is hard to tell 5 types of tomato seedlings apart when they are all 1 inch high!)

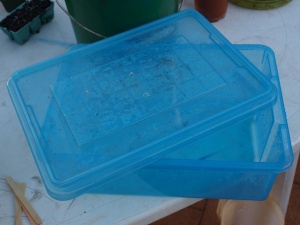
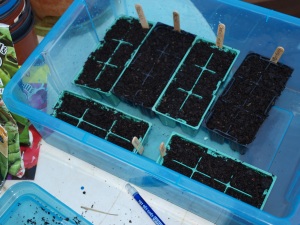
To Propagate/ germinate my seeds I use a plastic storage box (No kidding they sell these as ‘propagation houses’ for $20 at the hardware shop!)  For ventilation I have drilled six holes in the top.  Once filled and the lid is on tight, I place the filled box on the back verandah it receives indirect sunlight.The germination boxGermination box 2


I currently have the trays above full so when they start to germinate I will post about the next few steps.  Just remember some seeds take up to 2 weeks to germinate. 

Growing Guide ~ Eggplant

Eggplant  Solanum melongena

Family  Solanaceae

Relatives – Tomatoes, Capsicums, Potatoes

Seed to harvest 19 weeks

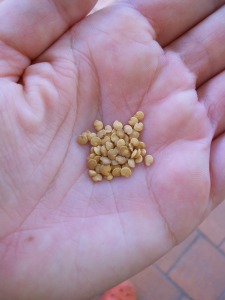
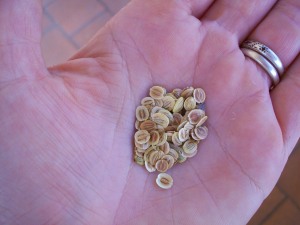
Eggplant seeds

Eggplants are very heat sensitive.  Seed should be started at least 2 weeks before the last frosts are due.  Eggplant seeds can be very slow to germinate, mine have take up to 3 weeks! 

Once the seedlings have emerged they will be very slow to progress to anything that looks like a eggplant.  It is during this time it is most important that they do not dry out or suffer any stresses as it too will delay growth.

Now if this all sounds to hard and too long, it is much easier to buy a plant from the nursery 😉

When finally the plants reach 10 to 15cm high they are large enough to be planted out into the garden.  Like their cousins the Tomatoes they like it hot.  A full sun position with soil rich in organic matter will give them the best start.  At 12 weeks they should begin to produce.  Unless you really like eggplants or have a very large family 1 or 2 plants will provide more than enough fruit.

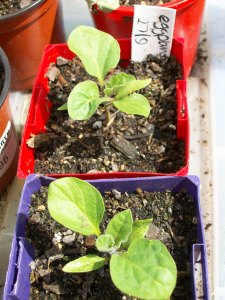
eggplant seedlings

These seeds were sown on the 27th of August.  And they are only 5cm high.  Very slow growing….

the bushes grow they might need some support.  Pinching out growing tips will cause the plants to bush, however this is more trouble than it is worth.

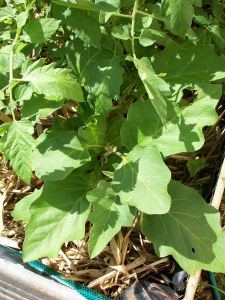
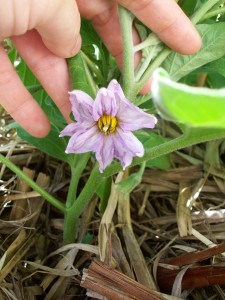
Dedicated gardenres can protect plants (providing your winters are not too cold)  from winter frosts.  I have accidently left a plant in a garden that was discontinued and my lovely hubby chucked a pallet ontop of it.  It lived through the winter and is now flowering like mad.


My eggplanteggplant flower

Growing Guide ~ Parsnips

Parsnips Pastinaca sativa

requested by Deb at Footprint reduction in the ‘burbs

Family Apiaceae

Relatives –  carrots, celery and parsely

Seeds to harvest –  20 to 30 weeks (roughly depending on germination)

parsnips seeds

Before sowing parsnips it must be noted they they can grow very long, up 30cm for a good specimen.  So a soil that is deep and friable, meaning it is not rock like just under the topsoil, is highly desirable.  If your soil is less than perfect for a fussy parsnip, a lovely gentleman with the most fantastic vegetable garden taught me to dig a deep cylinder shaped hole  and to back fill it with compost and friable soil and then pop your seeds in.

I have had limited success with parsnips in previous seasons, they can be difficult to germinate and take forever to emerge from the soil.  I find them as fiddly as carrots.  Also they will not transplant!

Have I turned you off growing them yet?

Parsnip seeds are small seeds that loose their viability very quickly.  So fresh seed each season is recommended.  Before sowing your seeds soak them overnight in warm to tepid water to help with germination. 

When sowing these seeds they can be as difficult as carrots are to germinate.  Some types can take several weeks to germinate.  Sow them with seeds such as radishes or lettuces so they are not forgotten.  Like carrots covering the sown seeds with a damp hessian sack can aid germination.  When the seedlings can be seen emerging from the soil uncover them.  Carrots and Parsnips are not good companions so grow them apart.  And also do not plant them in parts of the garden that have previously grown carrots or celery.

Parsnips here in Toowoomba can only be grown in the cooler months of winter.  Temperatures between 7 – 24C are ideal for germination.  They will also tolerate some shade.  Once they have successfully germinated, they need to be thinned down to one plant per 10-15cm.  It is often recommended to grow them in rows spaced at 30cm.  Again they can be grown closer, 10-15cms. 

Like most root crops irregular watering will cause the roots to split or become cracked.  To much water will cause the parsnips to rot.

Once you have successfully germinated your seeds, the plants are fairly easy to care for.  They can be harvested at any stage, but generally this is once the foliage has died back.  They will store in the fridge for several days, however it is best to store them in the ground until they are needed.

Growing Guide ~ Beetroots

BEETROOTS Beta vulgaris 

requested by Chris at Bushland Project

Family Chenopediaceae

Relatives – Spinach, silverbeet, chards

Seed to Harvest: 8 – 12 weeks
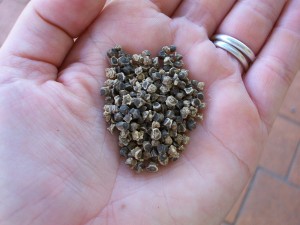
Beetroot seeds

Beetroot seeds are small capsules containing several seeds, like chards and beets who are of the same family.  Seeds can remain viable for 4-5 years when they are stored in cool, dry conditions.

Before sowing seeds soak them in warm to tepid water for several hours.  This insures the seeds are moist and will increase the rate and success of germination.  Planting guides recommend planting beets 10 to 15cm apart and 20 cm between rows.  Most gardeners do not have a lot of room for farm style row growing, I certainly do not.  So I sow my beet seeds roughly 10cm x 10cm apart.  (I would sow them further say 15cm if you want to harvest big beetroots)

Every 3 weeks sow another batch of seeds for a continual harvest but do not sow seed in the hottest part of summer.  For a full season of planting directly sow seeds 3 weeks before the last frost is expected and 8 weeks before the last frost is expected.  If you are worried about frosts, beetroots can be sown in trays, but do not let them become too big as they will not handle the transplant as well as they would if they were smaller.
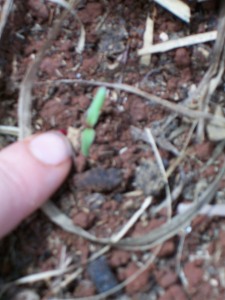
seedlingAs each seed contains several plants they will need to be thinned.  Either cut off the weaker looking shoots when they reach 2-3cm tall or if you have the patience gently dig out the unwanted seedlings and transplant them.

Beetroots are not as susceptible to forking as other root crops, such as carrots, however they will spilt and crack if they are irregularly watered.  They grow best when the soil is constantly moist.

When preparing the soil for planting, manure can be used to condition the soil, but an excess of nitrogen will create big tops and no roots. 

As the beetroots develop they tend to force themselves out of the ground, to protect them hill the soil gently around the ‘root.’

Plants are best harvested when they the size of a golf ball.  At this size they are sweet and juicy.  Try not to let beetroot become bigger than 10cm in diameter.  They will be tough and fibrous.

The leaves can be harvested for salads also.  It is important not to take more than 2 or 3 leaves from each plant at one time as it will defoliate the plant.


If there is any other vegetables you are interested in finding out about please leave a comment below. 

Coming up tomorrow Parsnip